Project Overview
We are designing a 120 sq foot cob shed utilizing best practices for building with cob in locations with seismic activity. Using the data that has been gleaned from testing over the past decade, as well as research that was done for the Appendix BK Cob Construction, we are designing a prototype cob building design. This design is intended to support people who want to build small cob sheds to do so more safely by giving guidance on critical things like wall thickness and height, where to put openings like windows and doors (and where not to), foundation details, where to put niches, and a clear explanation of how to understand how these variables affect the integrity of the structure.
The primary goal for this design is to help people build safer cob buildings.
Why 120 Sq feet?

In most (but not all) locations in the United States, one does not need a building permit to build a 120 sq foot ‘shed’. Due to its accessibility, fire resistance, environmental impact, and overall performance, there is increasing interest to build with cob. Much of this interest is from people who will be building something under this size limit, and it feels essential to support them in how to do so using the best practices. Our hope this design is only the first phase of this project, and that phase 2 is the design of a larger structure.
Design:
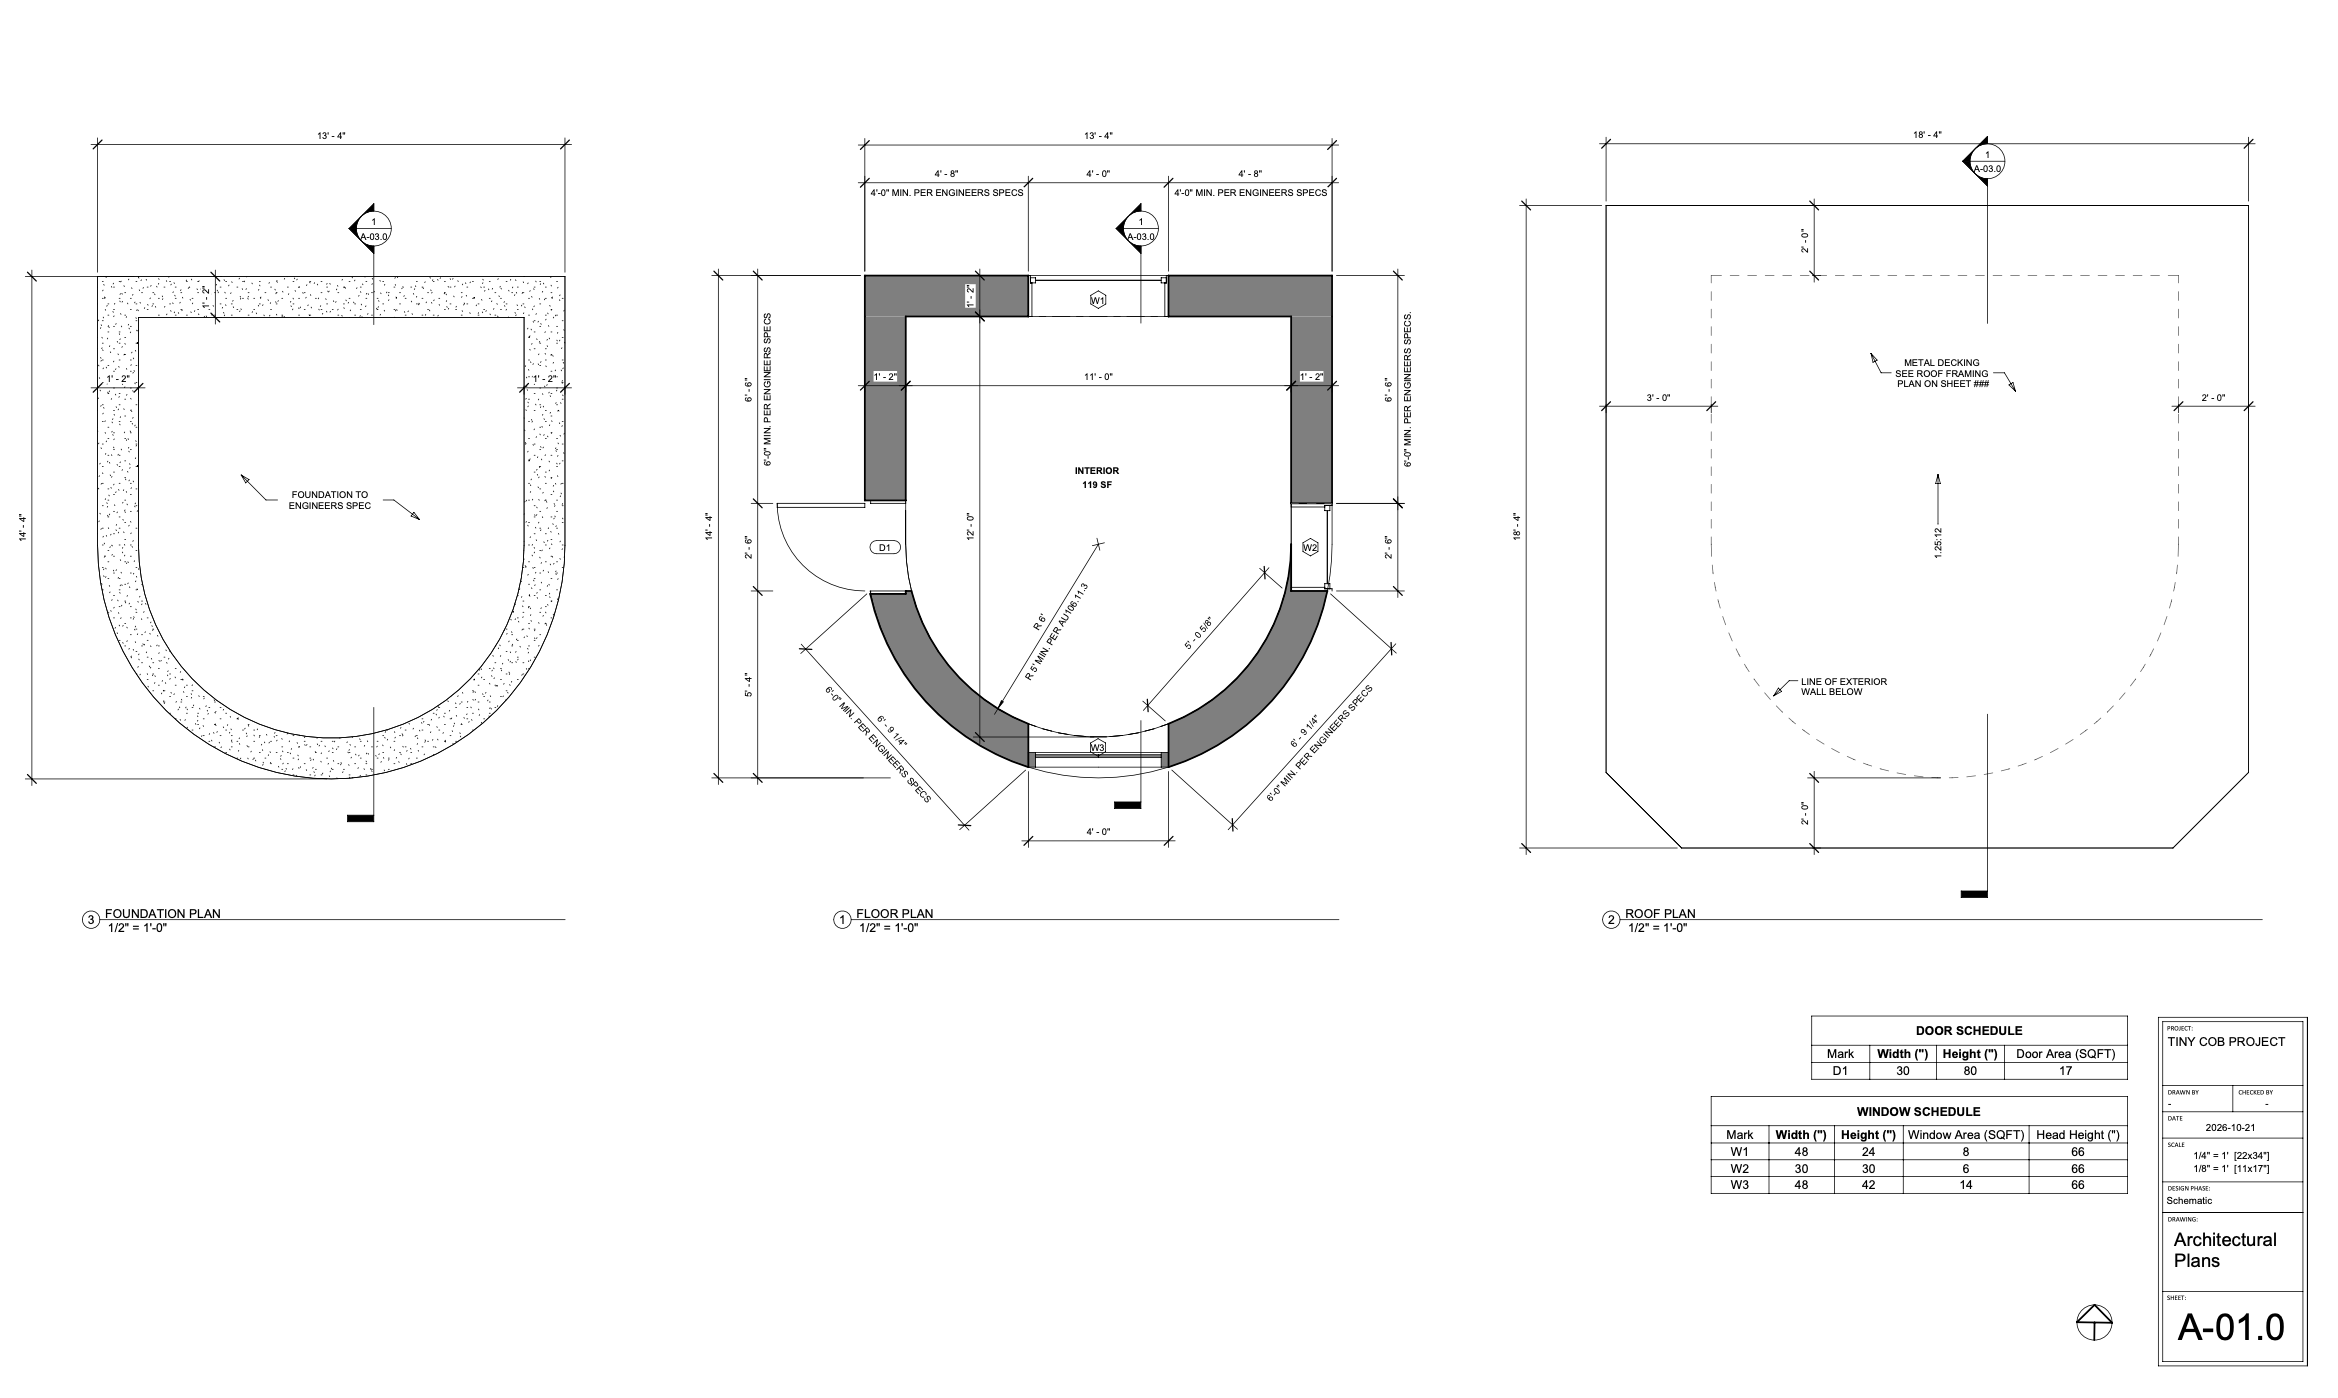
So far we have been working on the design and engineering component of the project (sneak peek in image below). We are almost done with this phase.
Visual-Guide Component:
This is where you come in!
The objective of the step-by-step guide is to explain the ‘why’ of different aspects of the design, in layman's terms, so that anyone can understand it. We are taking what we have learned from the testing, and what has been incorporated into Appendix BK, and explaining it in easy to understand language and diagrams. For example-we will explain why the windows and openings are where they are, and what flexibility you have to move them without compromising structural integrity in locations with seismic activity. We are imagining diagrams that show visual details of elements like roof attachments, and are very open to creative input from collaborators on this phase of the project. We would love to hear your ideas!
We don’t feel a need to rewrite any novels on the subject, and are aiming for this part of the project to be 15 pages or less.
What details will be shown in this visual-guide component:
List of materials
Where windows and doors can be placed - explain that the objective is to maintain a certain wall length without openings.
Where niches can be placed - how many and how deep
Where something like a bottle window can be placed, and how it effects integrity of structure
How thick the walls should be, with explanation of when this might differ
Show the size of headers, with example for when you might want to increase their size
Other foundation options - pros and cons
Show roof attachments in more detail
Explain importance of continuous foundation
Show attachment of walls to the foundation
Show top plate and explain the importance of it
Explain why plywood is used in the roof
Why not use AI for this phase of the project?
The short answer is, we dont want to. The longer answer is rooted in our deep held belief that we are all seeking more connection with that which is handmade. The belief that human input will be a valuable aspect of the project. Most of us came to natural building through a deep sense of wanting a connection to the built environment, to the buildings that we inhabit, and know that it is profoundly different to be surrounded by walls that are handmade rather than made with industrial materials. This is a handmade design project, made to support the people who are wanting to build a hand built structure.